Golang xORM 편리한 기능 소개

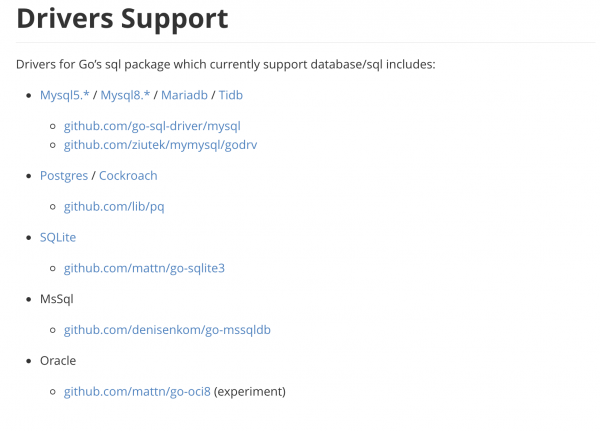
xORM은 필자가 선호하는 ORMObject–relational mapping 프레임워크이다. 주요 특징Features은 아래와 같다.
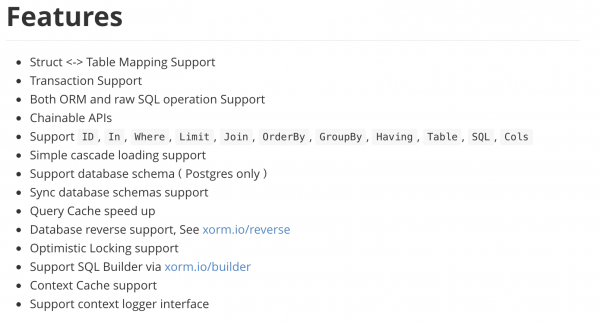
https://gobook.io/read/gitea.com/xorm/manual-en-US/
https://gobook.io/read/gitea.com/xorm/manual-en-US/
xORM은 대부분의 ORM에서 지원하는 테이블 간의 연관 관계 처리를 지원하지 않는다. 필요하면 직접 구현해야 한다. 언뜻 생각하면 불편할 것 같은데 연관 관계를 포기함으로써 기능들이 단순화되어 익히는데 시간이 짧게 걸리고 쓰기 쉽다는 장점이 있다.
이 글은 필자가 xORM을 사용하며 편리하다고 느낀 기능을 소개한다.
INSERT/UPDATE 시간을 자동으로 기록하기
아래와 같이 상품 테이블이 있다고 생각해 보자.
1 2 3 4 5 6CREATE TABLE IF NOT EXISTS products ( `id` INT NOT NULL AUTO_INCREMENT, `name` VARCHAR(100) NOT NULL, PRIMARY KEY (id) );
xORM으로 테이블을 아래와 같이 struct에 매핑할 수 있다.
1 2 3 4 5 6 7type Product struct { Id int64 `xorm:"id pk autoincr"` Name string `xorm:"name"` } func (Product) TableName() string { return "products" }
INSERT/UPDATE 시에 시간을 자동으로 기록하고 싶을 때가 있다.
이때 사용할 수 있는 것이 xORM의 Created와 Updated 태그이다.
Created tag will automatically inserted current time when you insert one record. - https://gobook.io/read/gitea.com/xorm/manual-en-US/chapter-04/1.created.html
Updated could automatically add a timestamp on the record when you insert or update one record. You have to add one updated tag on xorm tag section. -https://gobook.io/read/gitea.com/xorm/manual-en-US/chapter-06/2.updated.html
먼저 테이블에 시간 컬럼을 추가한다.
1 2 3 4 5 6CREATE TABLE IF NOT EXISTS products ( -- ... `created_at` DATETIME NOT NULL, `updated_at` DATETIME NOT NULL, );
그리고 코드에 Created와 Updated 태그로 추가 매핑한다.
1 2 3 4 5type Product struct { // ... CreatedAt time.Time `xorm:"created"` UpdatedAt time.Time `xorm:"updated"` }
xORM은 INSERT 하면 created_at 컬럼에 UPDATE 하면 updated_at 컬럼에 현재 시간을 자동으로 기록한다.
1 2 3 4var product Product engine.Insert(&product) // ... engine.ID(1).Update(&product)
데이터를 실제로 삭제하지 않고 삭제 효과 누리기
여러 가지 이유로 테이블에 데이터를 삭제하지 않으면서 삭제한 것처럼 해야 할 때가 있다.
간단하게는 삭제 여부를 기록하는 컬럼(Status)을 추가하여 구현할 수 있다.
1 2 3 4type Product struct { // ... Status string `xorm:"status"` }
단점은 상품 테이블을 조회할 때 삭제 여부를 항상 염두에 두어야 한다.
이때 사용할 수 있는 것이 xORM의 Deleted 태그이다.
Deleted will not really remove one record from table but only tag as deleted via current time. - https://gobook.io/read/gitea.com/xorm/manual-en-US/chapter-07/1.deleted.html
먼저 삭제 시간 컬럼을 추가한다.
1 2 3 4 5CREATE TABLE IF NOT EXISTS products ( -- ... `deleted_at` DATETIME, );
그리고 코드에 Deleted 태그로 추가 매핑한다.
1 2 3 4type Product struct { // ... DeletedAt time.Time `xorm:"deleted"` }
xORM은 SELECT 할 때 deleted_at에 값이 있다면 자동으로 결과에서 제외한다.
페이징 할 때 데이터와 총건수를 한 번에 조회하기
일반적으로 페이징 UI를 만들기 위해서는 두 가지가 필요하다.
- 전체 데이터 수
- 페이지 데이터
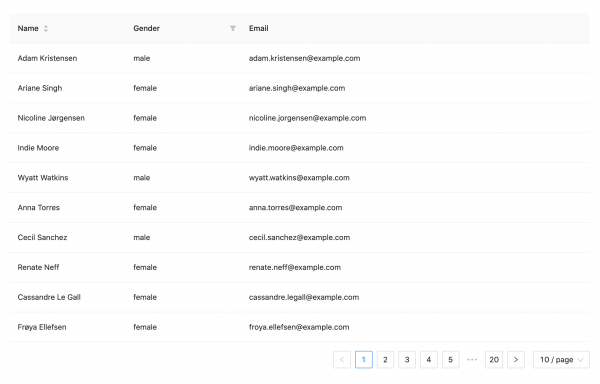
출처 : https://ant.design/components/table/
xORM으로 페이징 데이터를 아래처럼 조회할 수 있다.
1 2 3 4 5 6offset := (pageable.Page - 1) * pageable.PageSize var products Product // 페이지 데이터 조회 err := engine.Limit(pageable.PageSize, offset).Find(&products) // 전체 데이터 수 조회 count, err := engine.Count(entity.Product{});
xORM에서 제공하는 FindAndCount 함수로 위의 두 가지(페이지 데이터 조회, 전체 데이터 수 조회)를 한 번에 할 수 있다.
1count, err := engine.Limit(pageable.PageSize, offset).FindAndCount(&products)
코드는 줄었지만 데이터베이스 쿼리는 2번으로 동일하다.
마치며
필자는 FindAndCount 함수를 코드 리뷰를 통해 알았다. 코드 리뷰를 함께한 동료들에게 감사한다.